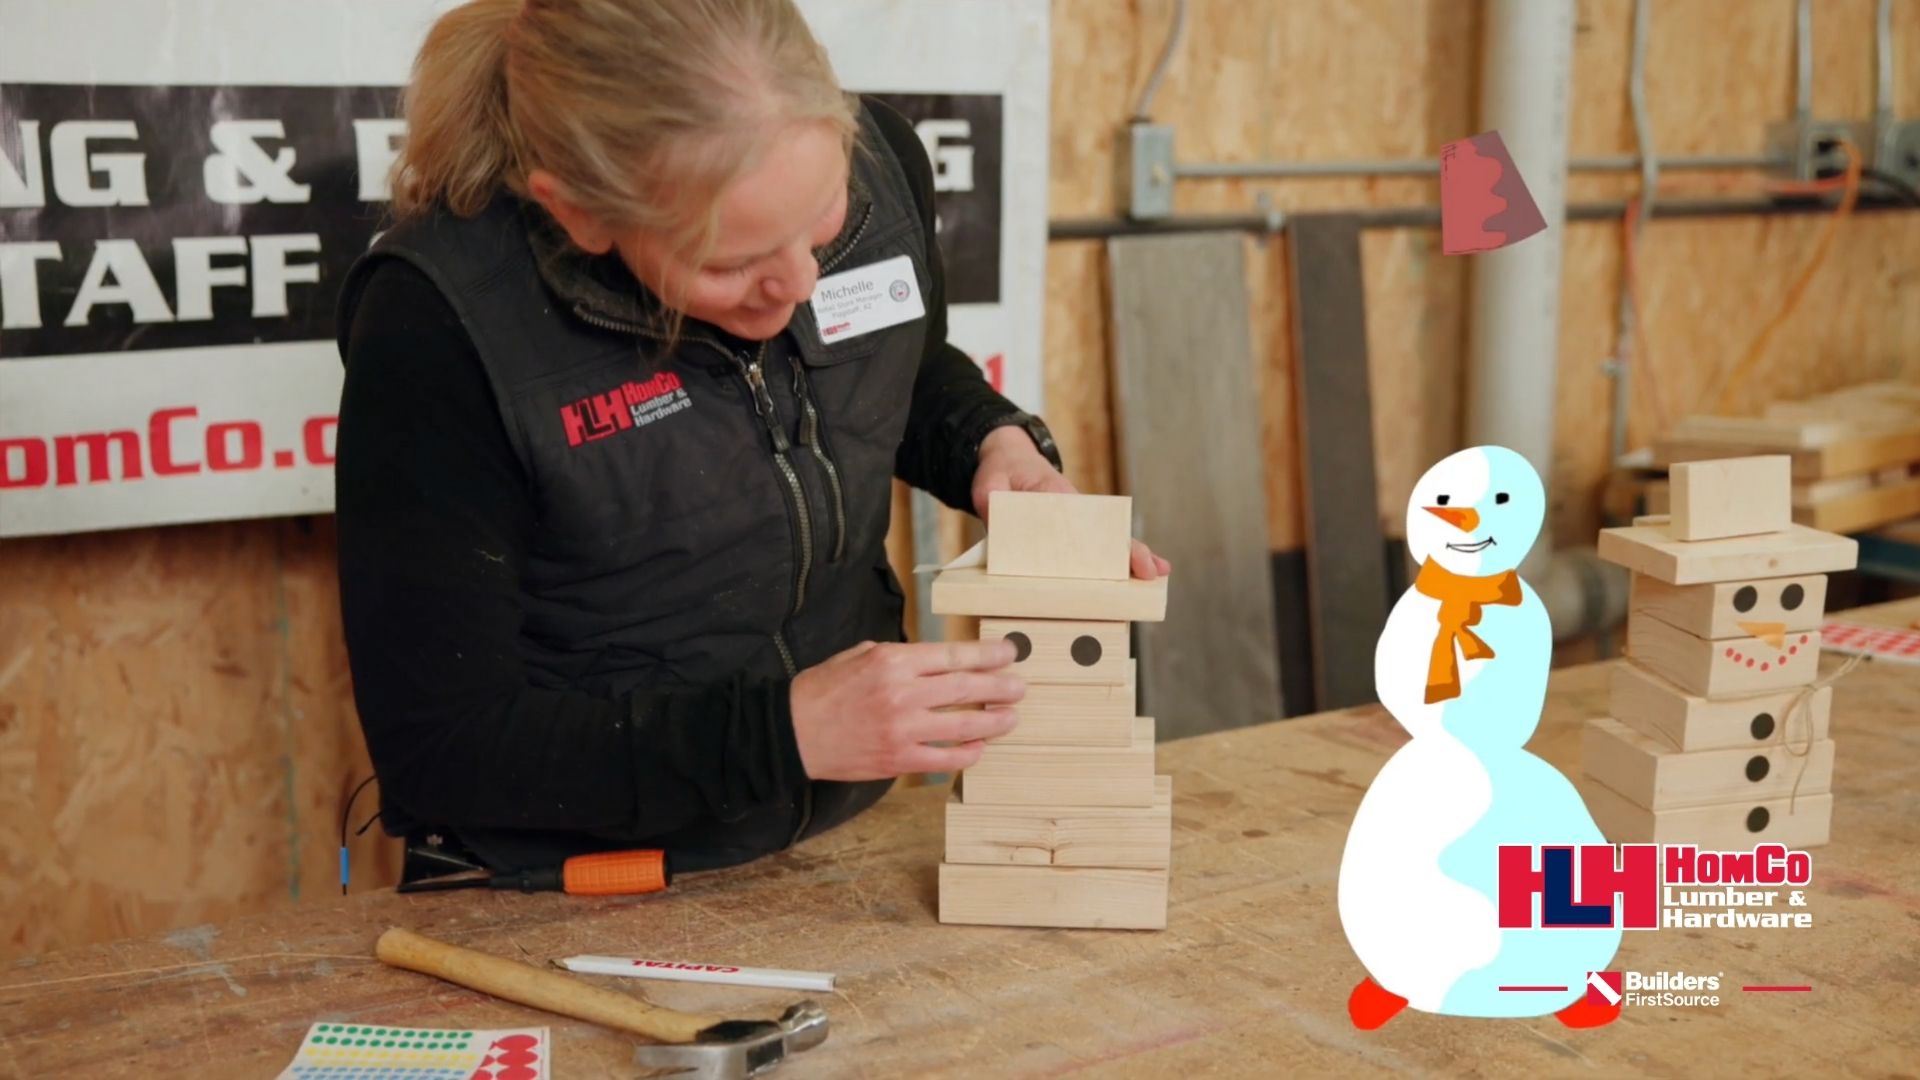
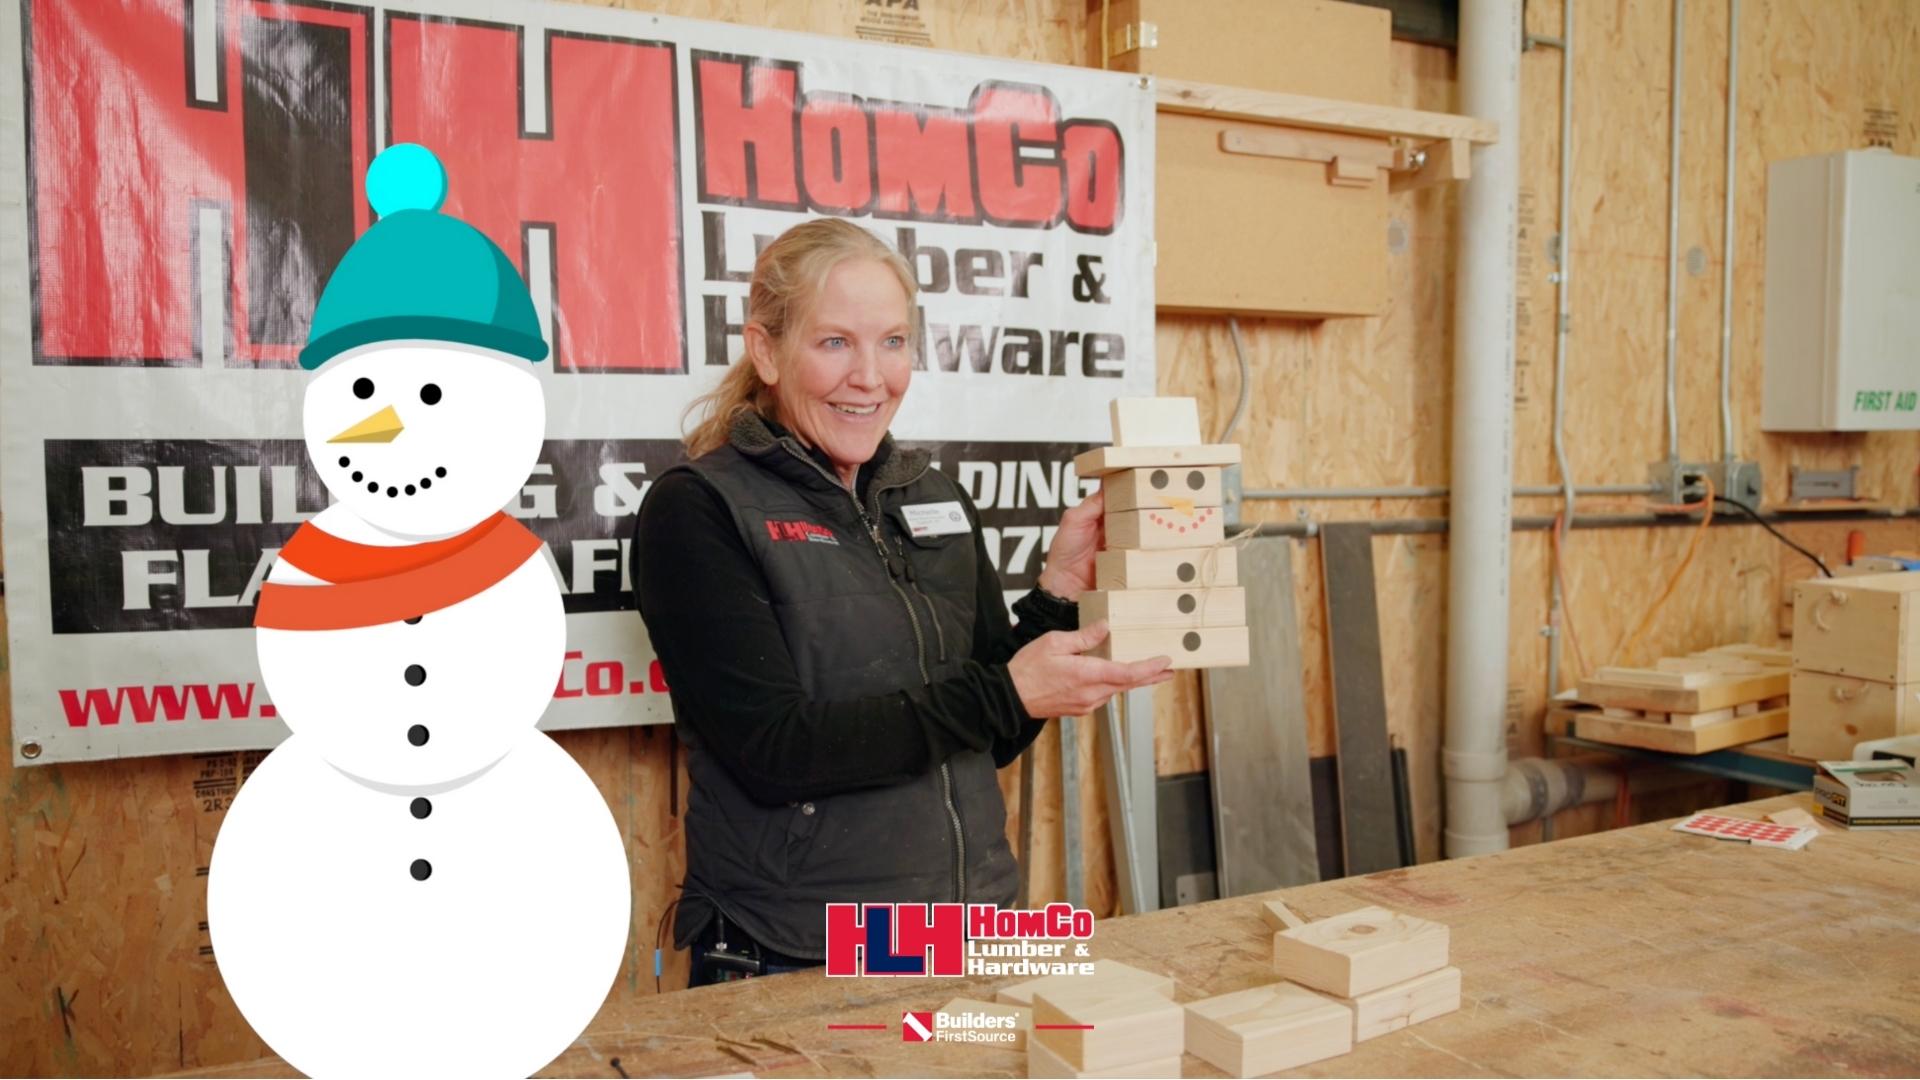
Young Builders Project: Wooden Snowman
Winter is the perfect season for cozy crafts, and our Young Builders’ Wooden Snowman project is a fun and festive way to celebrate. This free, hands-on activity is designed for kids and families to build, learn, and create together.
With simple materials and easy-to-follow steps, young builders will create an adorable wooden snowman that’s perfect for decorating their home all winter long!
Project Kit Includes:
-
A thin rectangle: for the back support
-
Two larger rectangles: for the bottom of the snowman
-
One medium rectangle: for the center section
-
Two smaller pieces: for the top and shoulders
-
Two thin pieces: for the snowman's hat
-
A hammer
-
A screwdriver
-
Stickers to decorate your snowman
Step-By-Step Instructions
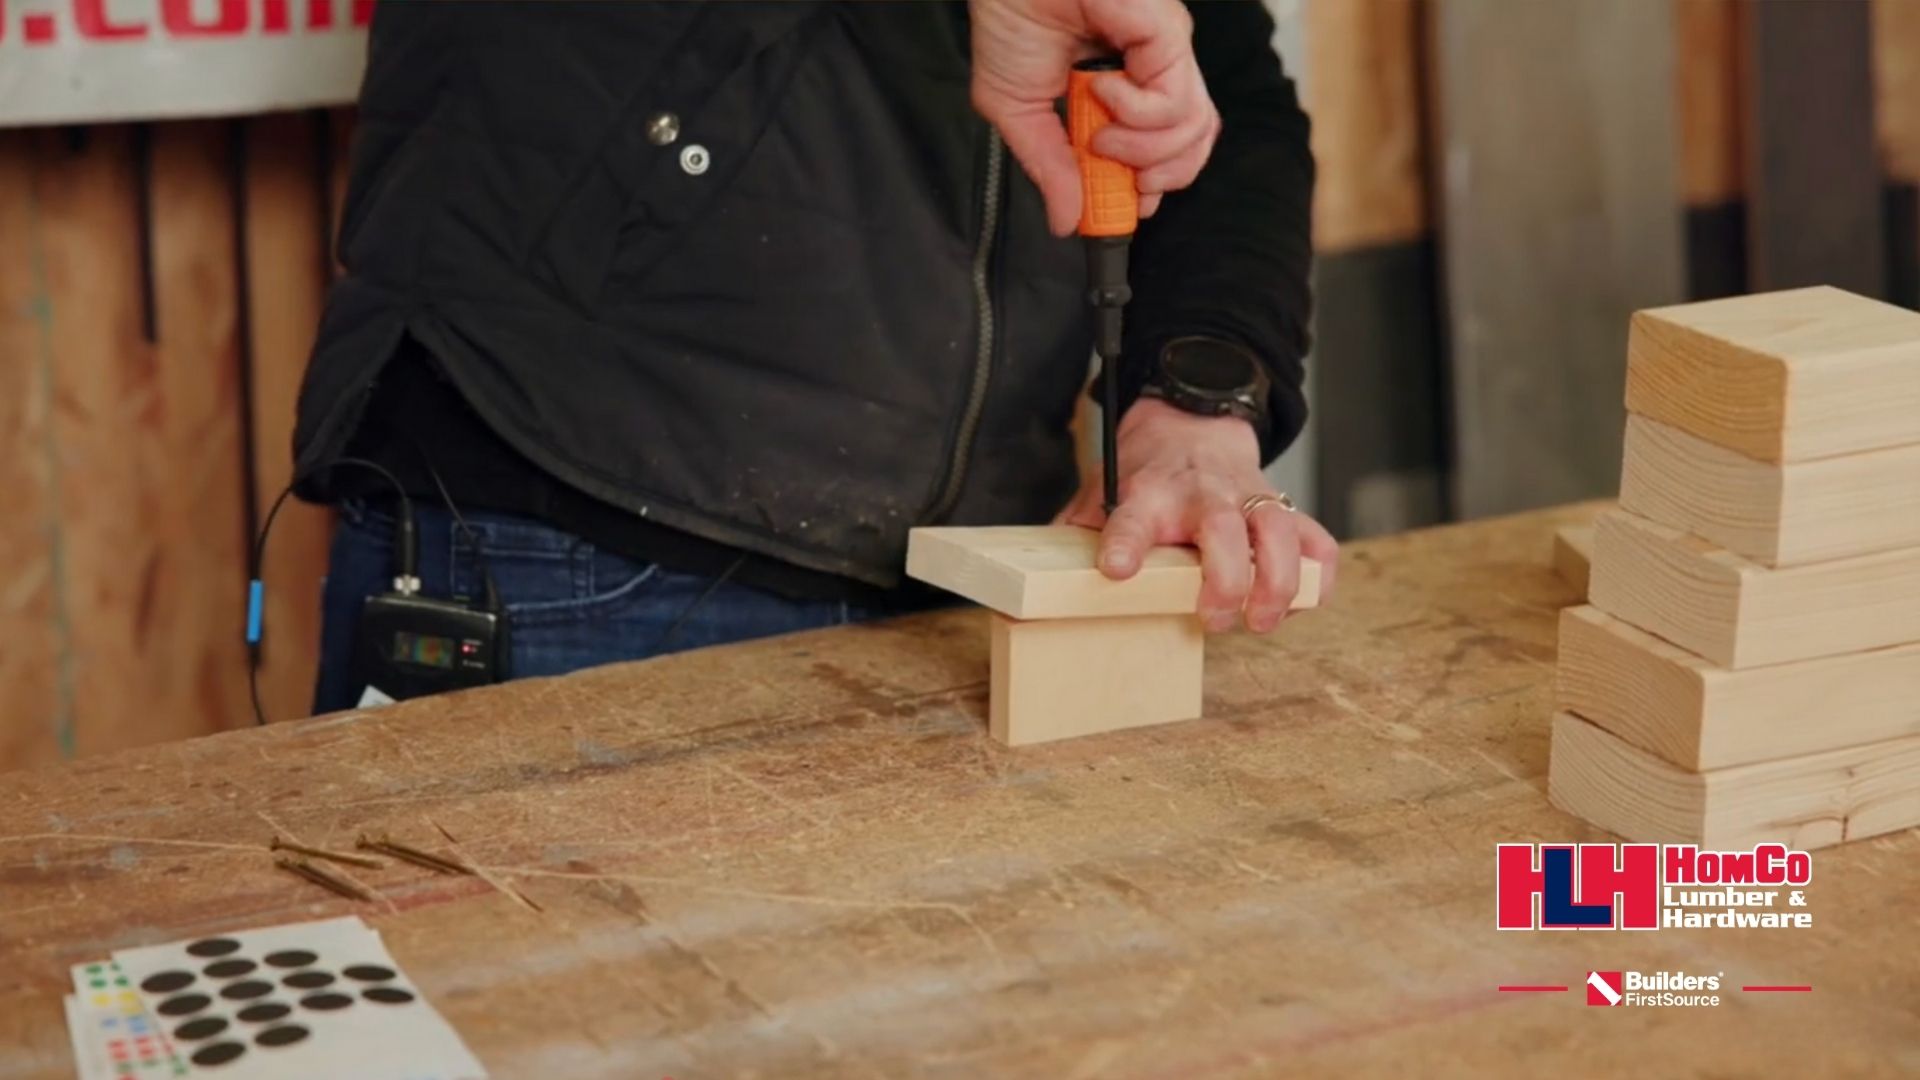
Step 1: Attach the hat
Using a screwdriver and one screw, attach the smaller rectangle (the hat) to the top piece of the snowman. This step requires a bit of pressure, so don’t hesitate to ask a grown-up for help.
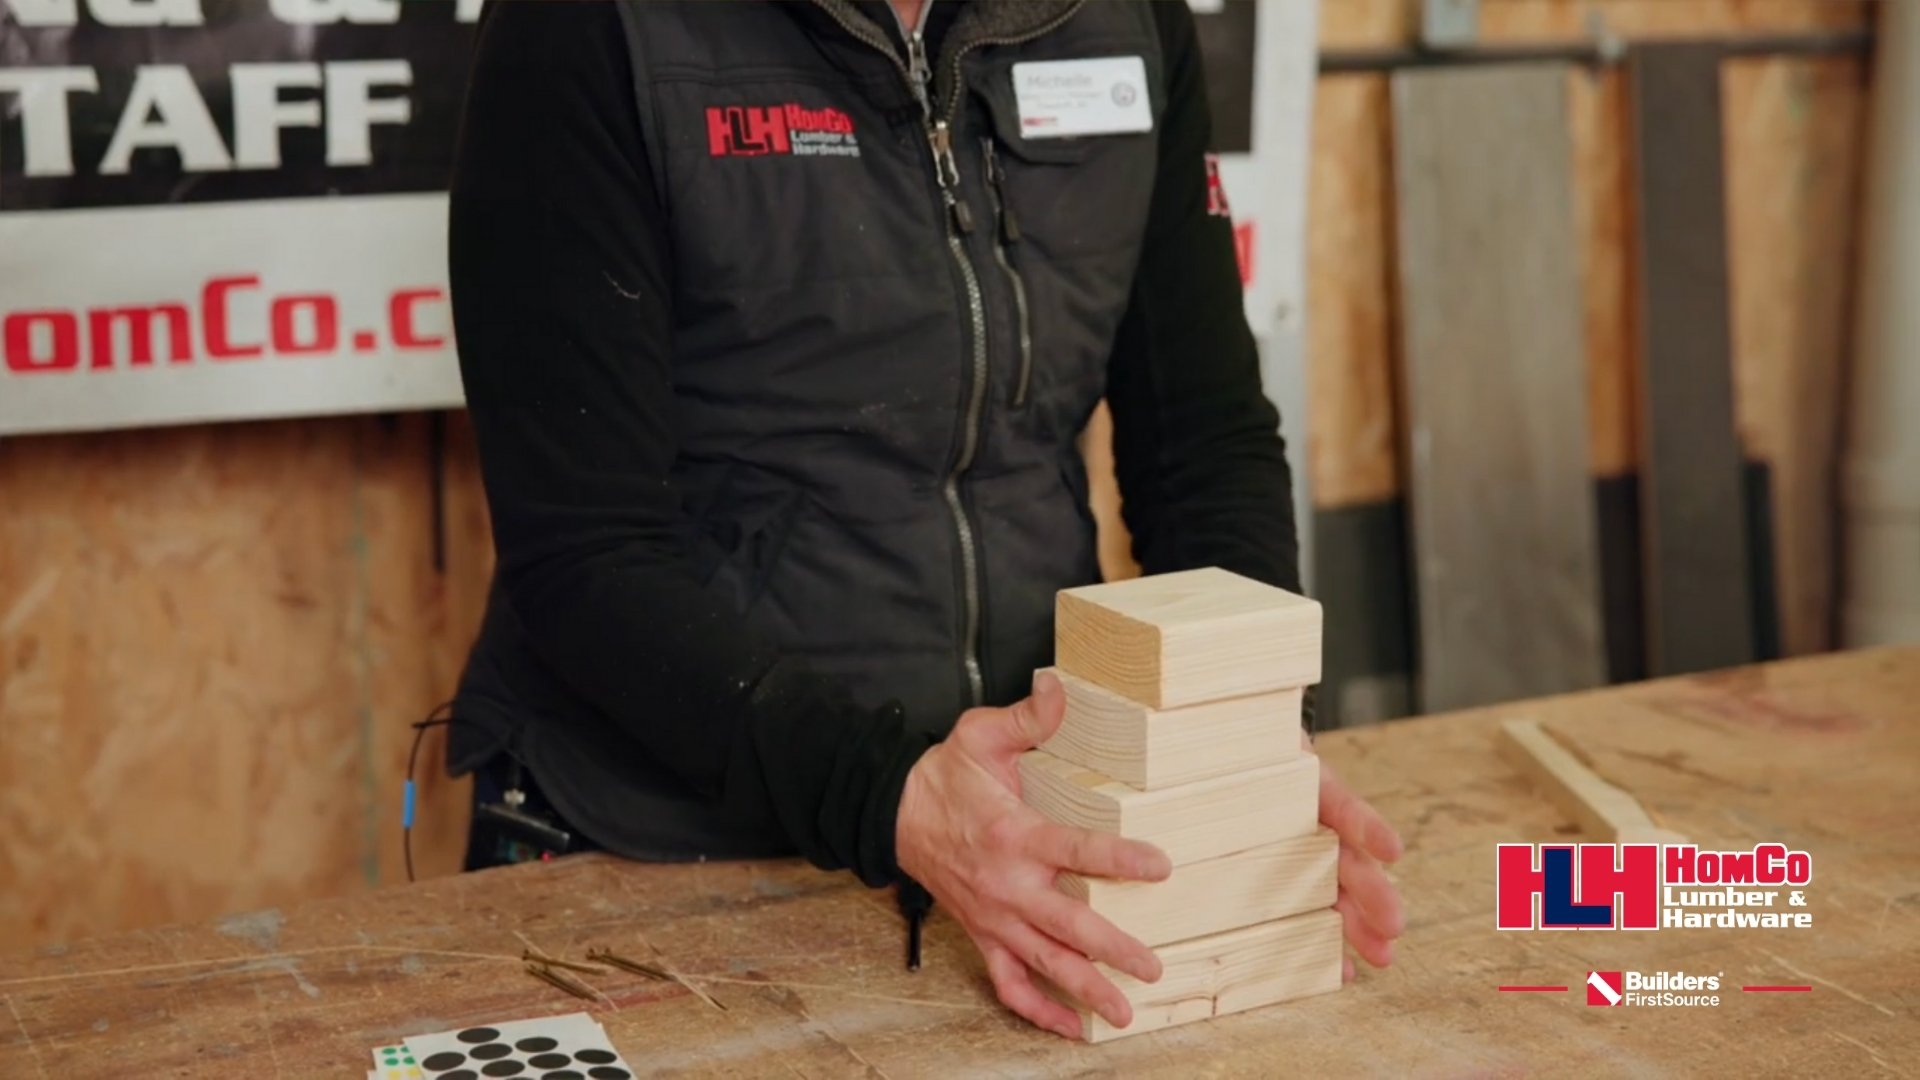
Step 2: Line up the pieces
Arrange the snowman’s body pieces on their sides, starting with the largest piece at the bottom, followed by the medium center piece, and then the two smaller pieces for the top and shoulders. Center the pieces as best you can — or create a “sideways snowman” if you’re feeling extra creative!
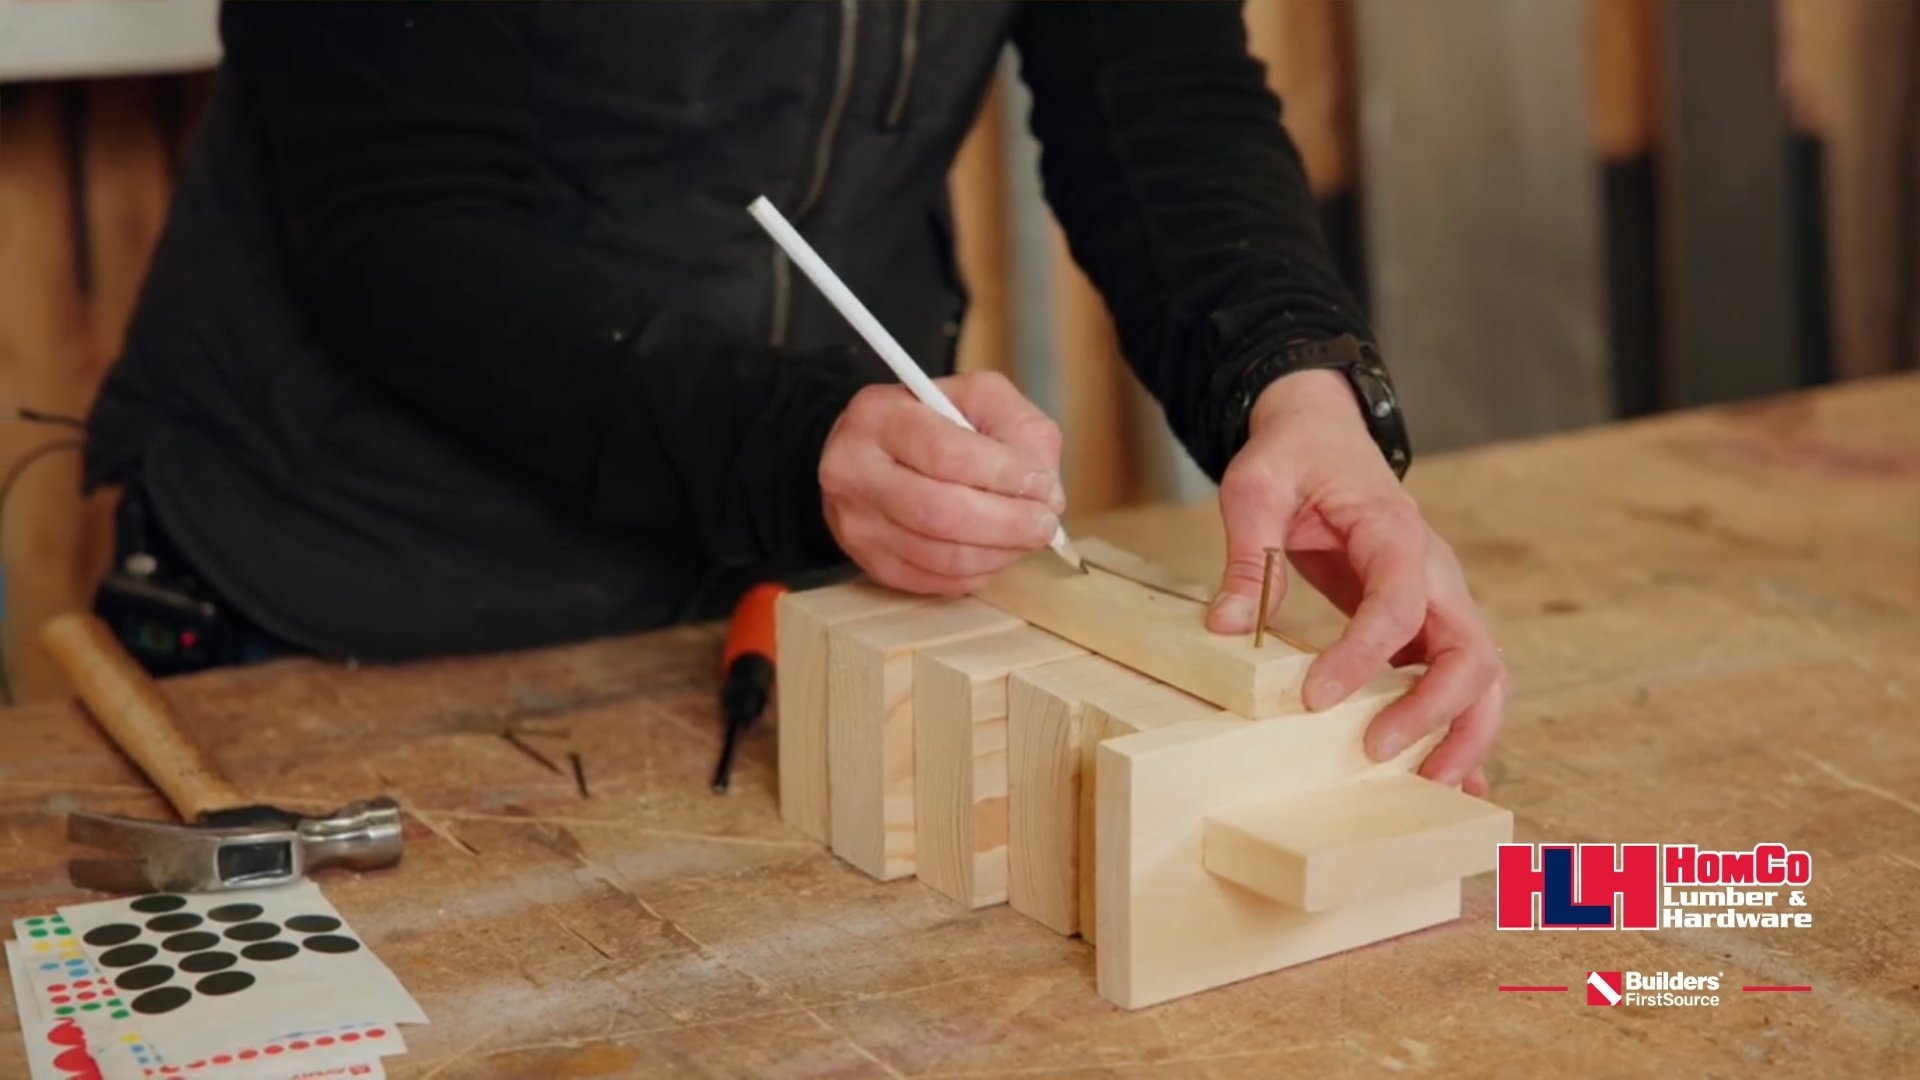
Step 3: Line up the brace
With the hat still attached at the top, place the long brace piece along the back of the stacked snowman pieces. Make sure it runs straight from top to bottom. Using a pencil, mark where each nail will go so every piece lines up correctly.
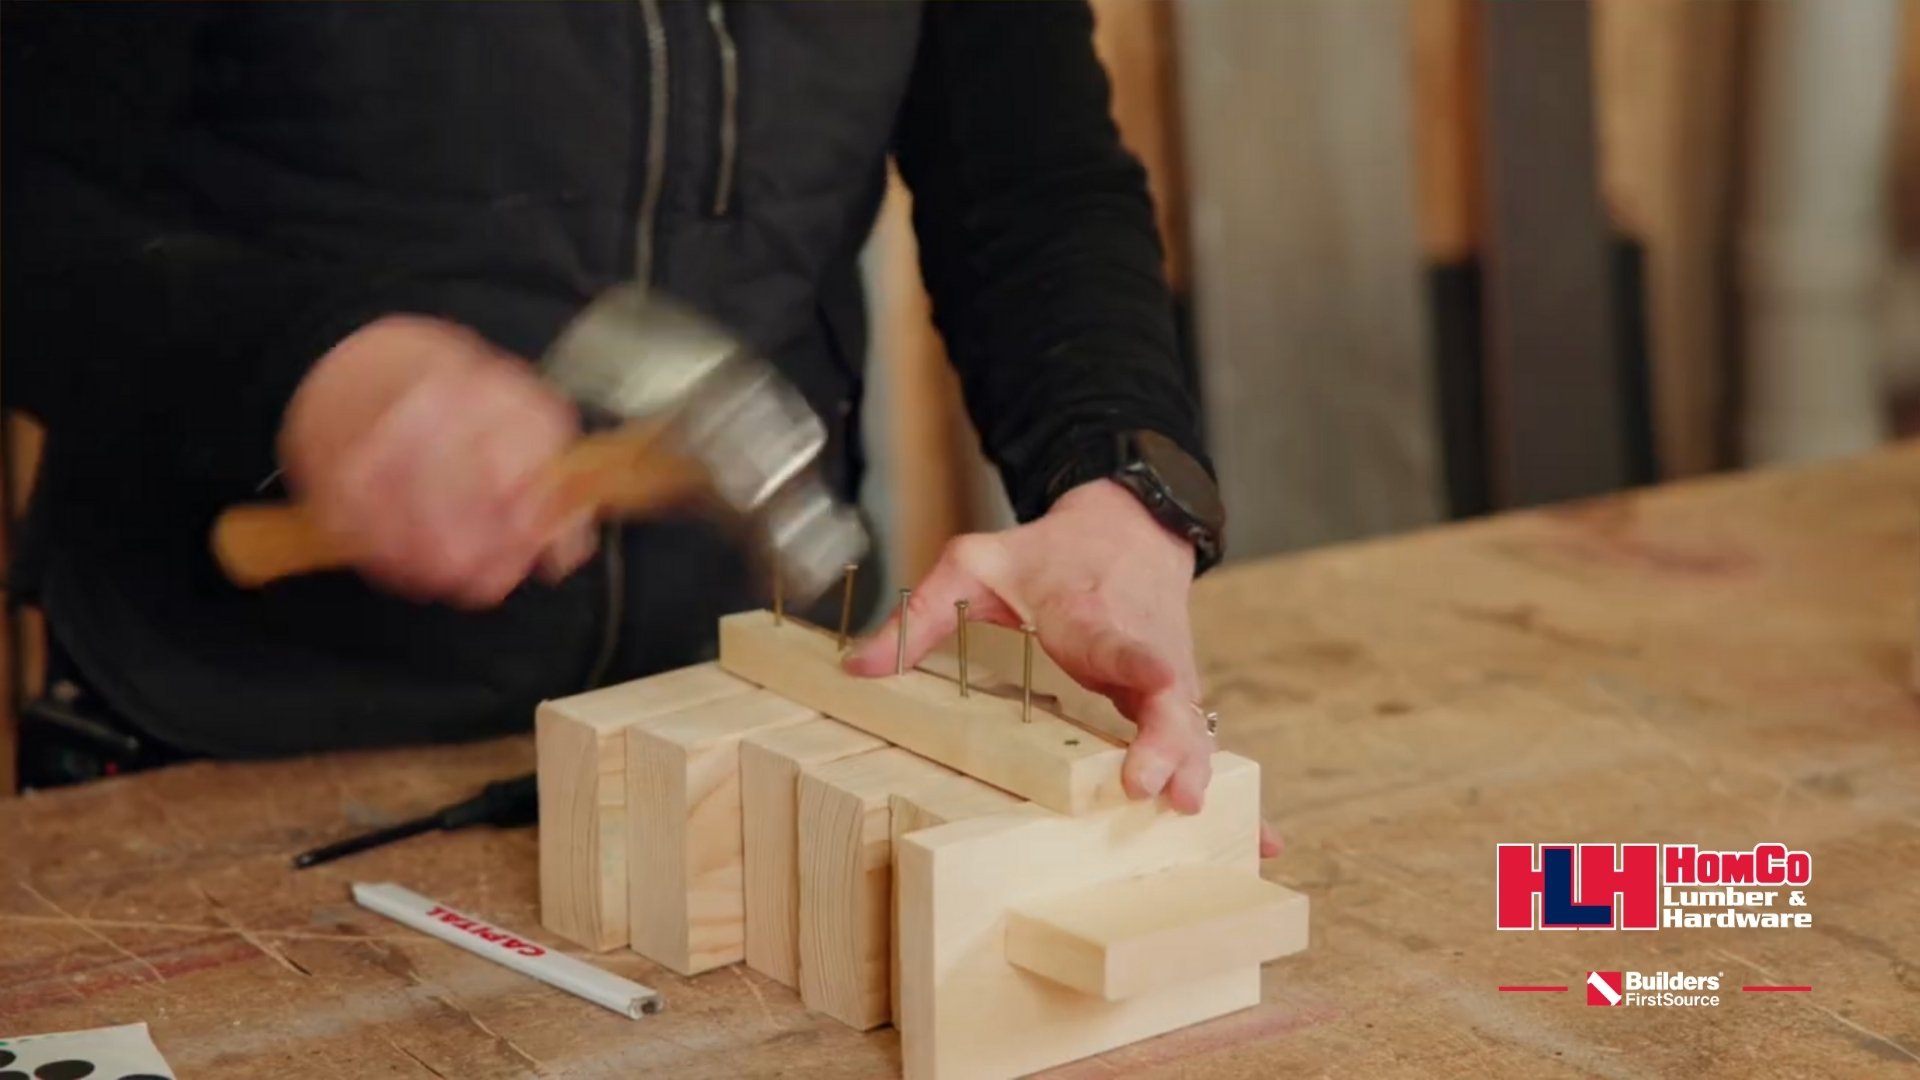
Step 4: Secure the brace
Using a hammer, gently pre-start each nail at the pencil marks. Once all nails are in place, hold the brace firmly against the back and hammer the nails all the way in to secure the entire snowman.
Step 5: Decorate your snowman!
Your snowman is complete! Use stickers, paint, and any other creative tools to decorate your snowman and make it completely your own.
Join Us for This Month’s Young Builder Event!
Don’t miss this month’s Young Builders event, held on the third Saturday of the month, on January 17th, 2026: Click here to RSVP and view the event on Facebook!
This family-friendly activity is a great way to spend a winter morning building something special while learning basic woodworking skills.
We’ll provide all the materials, tools, and guidance needed to build your very own wooden snowman.
Can’t make it to the event? Stop by our service counter and ask for a kit to build at home. We can’t wait to see you at HomCo Lumber & Hardware for this fun winter project! Reach out to our team now with any questions you have!
See also:
Young Builders Project: Wooden Snowman
Winter is the perfect season for cozy crafts, and our Young Builders’ Wooden Snowman project is a fun and festive way to celebrate. This free, hands-on activity is designed for kids and families to build, learn, and create together.
With simple materials and easy-to-follow steps, young builders will create an adorable wooden snowman that’s perfect for decorating their home all winter long!
Project Kit Includes:
-
A thin rectangle: for the back support
-
Two larger rectangles: for the bottom of the snowman
-
One medium rectangle: for the center section
-
Two smaller pieces: for the top and shoulders
-
Two thin pieces: for the snowman's hat
-
A hammer
-
A screwdriver
-
Stickers to decorate your snowman
Step-By-Step Instructions
Step 1: Attach the hat
Using a screwdriver and one screw, attach the smaller rectangle (the hat) to the top piece of the snowman. This step requires a bit of pressure, so don’t hesitate to ask a grown-up for help.
Step 2: Line up the pieces
Arrange the snowman’s body pieces on their sides, starting with the largest piece at the bottom, followed by the medium center piece, and then the two smaller pieces for the top and shoulders. Center the pieces as best you can — or create a “sideways snowman” if you’re feeling extra creative!
Step 3: Line up the brace
With the hat still attached at the top, place the long brace piece along the back of the stacked snowman pieces. Make sure it runs straight from top to bottom. Using a pencil, mark where each nail will go so every piece lines up correctly.
Step 4: Secure the brace
Using a hammer, gently pre-start each nail at the pencil marks. Once all nails are in place, hold the brace firmly against the back and hammer the nails all the way in to secure the entire snowman.
Step 5: Decorate your snowman!
Your snowman is complete! Use stickers, paint, and any other creative tools to decorate your snowman and make it completely your own.
Join Us for This Month’s Young Builder Event!
Don’t miss this month’s Young Builders event, held on the third Saturday of the month, on January 17th, 2026: Click here to RSVP and view the event on Facebook!
This family-friendly activity is a great way to spend a winter morning building something special while learning basic woodworking skills.
We’ll provide all the materials, tools, and guidance needed to build your very own wooden snowman.
Can’t make it to the event? Stop by our service counter and ask for a kit to build at home. We can’t wait to see you at HomCo Lumber & Hardware for this fun winter project! Reach out to our team now with any questions you have!
See also: